Follow along this step-by-step tutorial to learn how to replace coil balances.

If your tilt window coil balances fail to easily open and close your window, you can replace the system instead of getting all new windows. Follow along this step-by-step tutorial to learn how to replace coil balances. This repair demonstration is done on a lower, inner sash. The cut-out location for an outer, upper sash is different and will not be shown.
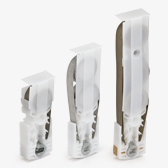
Necessary Tools:
WARNING: be sure to wear safety glasses and use caution, as the triple coil springs can have a lot of tension

STEP 1
Start by marking the area where you’ll be cutting into the frame. Measure a half-inch down on the
sash for your first mark on the frame. Make the second mark two inches below the first. Be sure to
be precise so the cut-out doesn't interfere with the function of the tilt latches. Repeat on the
other side of the window.


STEP 2
To remove the sash, raise it a few inches above the sill then push the tilt latches in to disengage
them from the frame. Tilt the window in toward you. Stagger the sides of the frames to get one pivot
bar out at a time.

STEP 3
Use a slotted screwdriver to lightly pry the sash stops and balance covers off if you have them.


STEP 4
Disengage the pivot shoe by rotating the metal cam, then slide it up the channel to meet the coil
assembly. Use a Philip’s head screwdriver to unfasten the coil support letting the whole assembly
fall below the marked area.


STEP 5
With the coils out of the way, extend your markings to the other side of the channel. Now you should
be ready to begin cutting out your marked area. Use a utility knife to cut along the marks, then
score along the length of the cut-out.


STEP 6
Use needle-nose pliers to gradually work the area completely out.


STEP 7
Smooth out any rough edges with a chisel and file.


STEP 8
Now to remove the coils, slide the assembly up past the cut-out then rotate the pivot shoe. Use a
slotted screwdriver to wedge the coils out and over the cut-out.

STEP 9
Assemble the new coil system by linking each coil and attaching the bottom tab to the pivot shoe.


STEP 10
Work the new coil back through the cut-out, making sure to install it with the pivot shoe cam facing
out. If you need additional space to work, extend the bottom of your cut-out slightly. Once the coil
system is back in place, fasten it back into the jamb.


STEP 11
Using a slotted screwdriver, slide the pivot shoe down a few inches. Rotate the pivot cam to the
closed position to set it in place. You may want to stagger the placement on each side of the frame
to prepare for reinstalling the sash.

STEP 12
Place any balance covers and sash stops back into place, then reinstall the sash.

If you’re working on an older window, odds are they may have undergone repairs in the past. If so, check for a cut-out before beginning. If there is one, just clean it up and enlarge it if necessary.
If your coil balance is using multiple springs with lower tension stamps, you may be able to replace them with fewer coils with higher tension that will support the same sash weight. For example, if you have three, 2-pound coils on each side of the window, they can be replaced with two, 3-pound coils. Both options can support a 12-pound sash.
For more guidance and to see our experts’ take on the repair, watch our video below: