Choosing a Non-tilt Channel Balance: What Will We Need?
Once we know exactly what your window needs to operate properly, our experts are ready to walk you through installing your new balances.
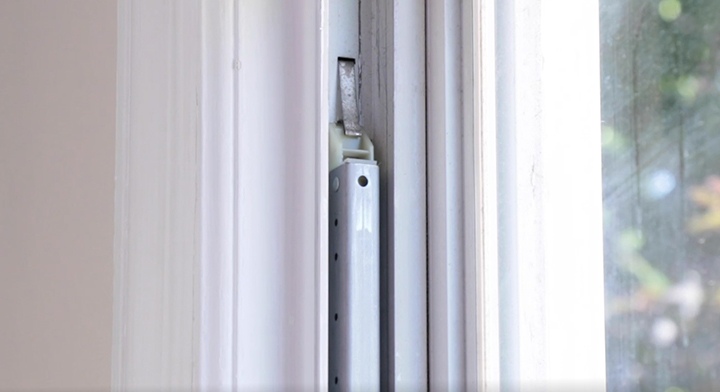
Channel balances are block and tackle mechanisms that utilize springs and pulleys to counterbalance the weight of the sash, allowing it to stay up when raised and for overall smoother operation. This guide will feature channel balances specifically designed for non-tilt windows, which have sashes that cannot be tilted in for cleaning purposes. There is a wide array of non-tilt channel balances, many with just slight variations that affect their compatibility with your window.
This guide will help you purchase replacement balances with confidence! To assist with that goal, we have a team of experts on standby waiting to review your balances and recommend the correct replacements. They are ready to discuss your repair through our free part identification service where you can submit information for them to research for you.
Information the SWISCO.com experts will need to ID your balance:
- Metal balance channel width.
- Metal balance channel length.
- Close-up photos of both top and bottom balance fittings.
- A photo of the fitting attached at the end of the balance cord.
- A photo of the balance channel stamp code.
STEP 1: BALANCE WIDTH
The first detail to check when identifying a non-tilt channel balance is the width of the metal balance itself. SWISCO.com stocks a few balance sizes, our most popular being 1/2″ (The width of the metal channel measures 9/16″ but is considered 1/2″ in the trade.) and 3/8″. Make sure to confirm your balance width to ensure our experts have all the information they need to recommend your replacements.

STEP 2: BALANCE FITTINGS
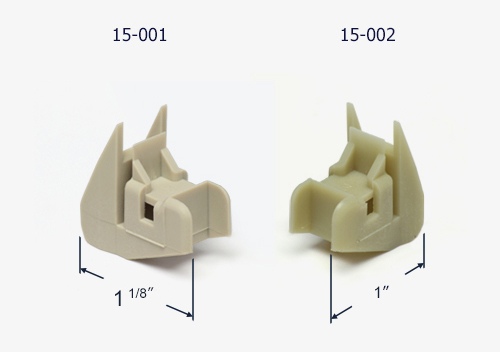
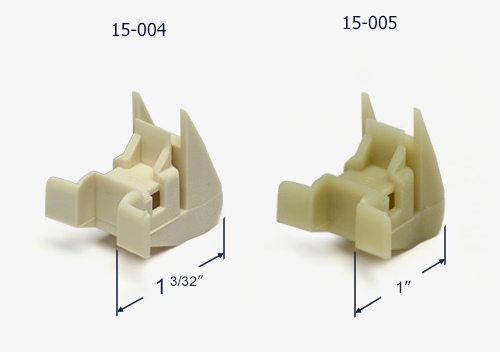
Next, determine the balance Series you are working with. SWISCO classifies all of its non-tilt channel balances by the style and combination of fittings on either end of the metal channel.
One detail to consider is whether either of the fittings has ‘wings’, or tabs protruding from either side. These wings are meant to provide extra stability within the jamb for certain window configurations.
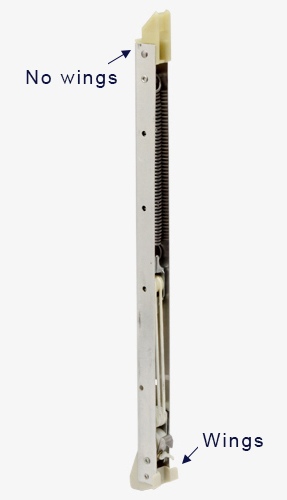
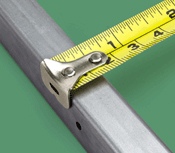
Another critical dimension is the depth of the bottom fitting or shoe. The depth is the ‘heel-to-toe’ measurement of the shoe, which is positioned on the bottom of the metal channel when installed.
STEP 3: BALANCE SHOE DEPTH
The bottom shoe plays an important role in the functionality of the balance, which is why your replacement needs to have the same dimensions as the original. If the shoe is too small, the sash will be loose and wobble around a bit. If the shoe is too deep, then it will grind into the jamb and possibly damage it.
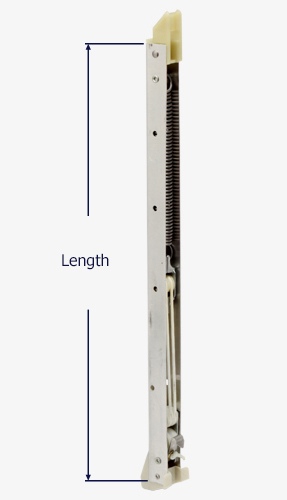
STEP 4: BALANCE LENGTH
The next step is to determine the balance length needed. To do this, simply measure the length of the metal channel. Be certain not to include the fittings at either end of the balance in this measurement.
STEP 5: STAMP OPTION
Finally, our experts will need to identify the correct spring strength option based on your balance stamp. The stamp option is not used to identify the balance series or product number; rather, it designates the weight range the balance was calibrated to support. This is typically designated by a stamp code somewhere on the metal channel.
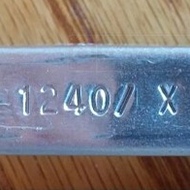
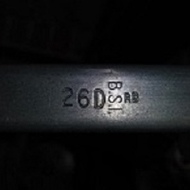
Showing a photo of your stamp to our experts will generally tell them all they need to know about the tension your balance requires.
In some instances, the experts will recommend you weigh your window sash using a standard bathroom scale. In all cases, we recommend you include a photograph of your balance’s stamp code in your discussion with SWISCO’s experts.
INSTALLING THE NEW BALANCES
Keep in mind that you may have a balance with attachments that don’t quite match up to any of our stock options. Our experts on the SWISCO.com discussion board can still research replacements for you using the photos and information we’ve discussed so far.
Once you know exactly what your window needs to operate properly, our experts are ready to walk you through installing your new balances. They cover everything from removing and reinstalling the sash, to releasing the balance cord from the jamb safely in the SWISCO tutorial below!

