Broken balance assembly

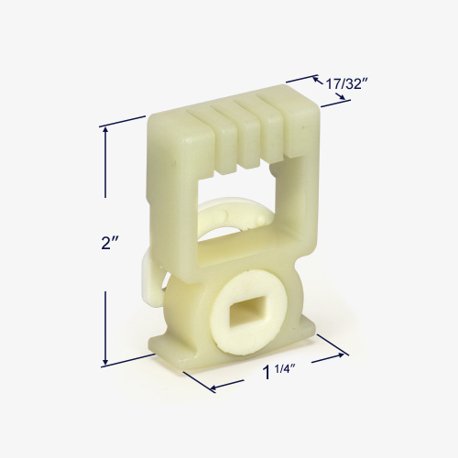
Thanks for reaching out! The coil balance shoe you have reminds me of the 15-140 Coil Balance Shoe. To confirm that this is what you need for your repairs, be sure to carefully compare them to your existing shoe.
The compatible coil spring is the Series 150 Coil Balance. To determine the right coil for your assemblies, you'll need to look for any stamps/markings that will indicate the amount of tension the spring can hold. If there aren't any stamps/markings, you'll need to obtain the exact weight of the sash and divide that by the total number of coils in the window.
To replace the covers you can use the 15-143 Coil Bushing, 15-144 Coil Bushing Cap, and the 15-145 Coil Support Barrel.
Thanks for confirming the sash weights. For the 14lb sash, you'll need the S150-7 Coil Balances and for the 16lb sash you'll need the S150-8 Coil Balances.
I'm sorry to say I would not be able to send a photo of the items assembled because they are sold as individual parts. The good news is, they are fairly easy to assemble.
- For the coil balance cover, you'll need to place the coil on the 15-143 Coil Bushing. Next you'll put the 15-145 Coil Support Barrel in the center of the coil. Then with the coil and the support barrel inside, you'll snap the 15-144 Coil Bushing Cap onto the 15-143.
- The coil springs hook into the teeth on the shoe. Take a look at the customer's photo from this thread for an idea of what that looks like.
