Installing the 32-507 Automatic Safety Door Closer
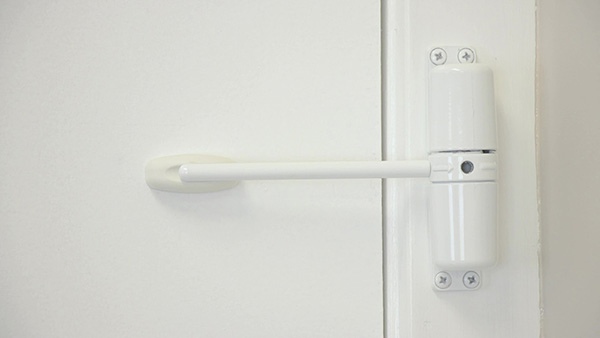
SWISCO’s 32-507 Automatic Safety Door Closer is intended to be used on interior household doors that are mistakenly left open. This tutorial will guide you through the steps of installing one in your own home.
- Adjustable tension
- Non-handed
- Suitable for installation on either left or right-handed doors
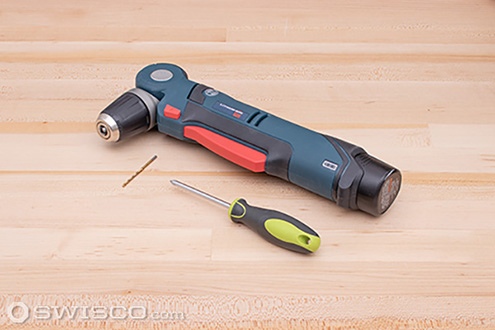
- Power Drill
- Philips head screwdriver with a 3/32" drill bit
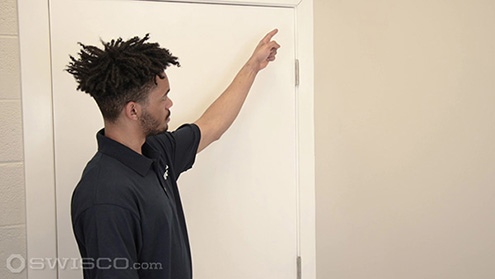
STEP 1
First, you’ll need to decide where to position your closer. It can be installed anywhere on the
hinge side, but choose a higher location if you’d like it to be out of reach of children.
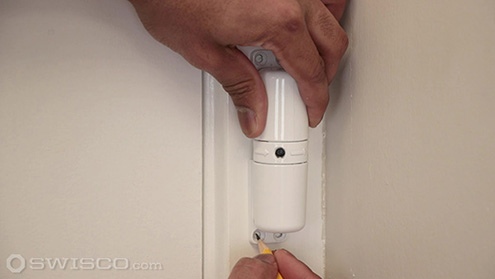
STEP 2
The closer installs on the jamb with the arrows pointing away from the door. Once you’ve determined
your location, mark the screw positions with a pencil.
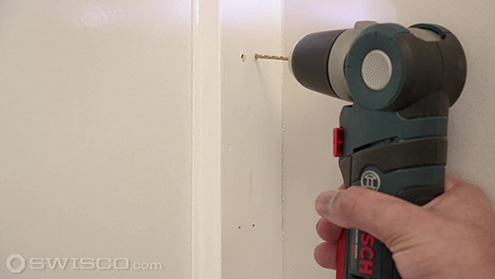
STEP 3
With your drill and 3/32” drill bit, make pilot holes over the marked locations. A pilot hole is
just a small hole that helps to guide the screw in without causing the wood to split.
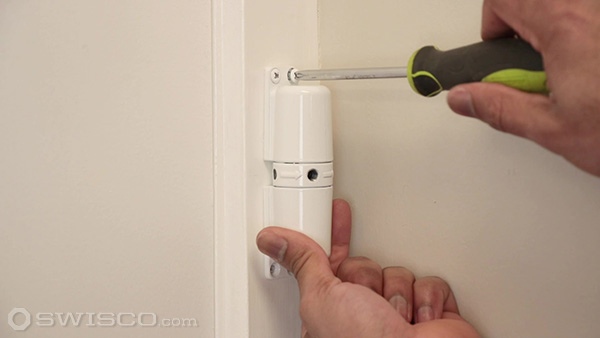
STEP 4
With a Philip’s head screwdriver, fasten the closer into place with the arrows still facing out.
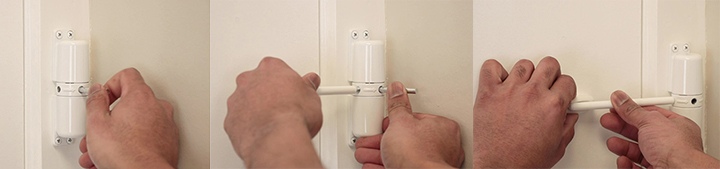
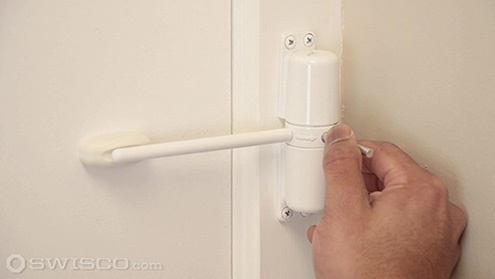
STEP 5
Temporarily attach the winding rod and rotate it away from the door. Add the closer arm to the next
visible hole, then remove the winding rod and position the slide plate under the closer arm. Unscrew
the closer arm to make room for the slide plate installation.
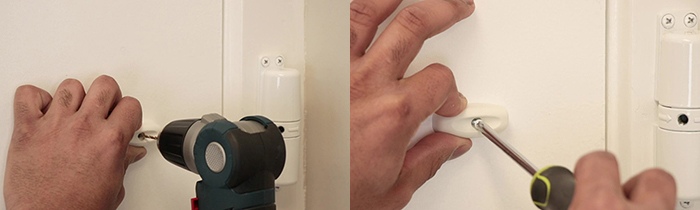
STEP 6
While holding the slide plate in place, drill an installation hole then screw the plate into place.
Pro Tip: We found it was easier to hold the plate in position because the depth of the hole would not allow a standard pencil to reach the door. If you have a narrow scratch awl on hand, you can make a small mark for the hole placement, then move the plate off the door while you drill.
STEP 7
Reattach the closer arm and winding rod. Use the winding rod to increase the closer’s tension. Wind
the closer to a farther hole if you need to increase the closing speed of your door.
For additional explanation, watch our experts work through the installation in the video below.
