broken shoes, broken pins, broken hearted.

Handy Person from Central PA
As you can see, the shoes are trash, both the upper sash supported by the tri-fecta of springs and the lower sash sporting two spring sets. Our sloppy measurements from a tape measure appears to be 1 9/16, maybe 1 17/32nds wide by 9/16" thick. I believe the height of the shoe is a mute point. Straps, both the tri balance and the dual balance use a common 3/8 screw to secure them onto the shoe on a leading edge on the right side clear of the track of course. The cam locks sockets are broken beyond any utility. The only pin pieces left were retrieved from the disassembly of the lower sash frame bar and the securing device respectively. I abandoned the manly prerogative of ordering all that I might think will fit and opted to ask for expert advice as a demonstration of correctly attacking this situation for my daughter's sake; it's her new old house. Everyone wants to sell her a new window. I told her we can make this window work again. Her angle is home safety, mine is simply fixin' it.
2 user uploaded images
2 Replies
Jasmine
Jasmine from SWISCO
SWISCO
Expert

Hello,

Thanks for writing in! This coil balance assembly can be replaced with the 15-177 Coil Balance Shoe. I am confident this is the replacement you'll need but be sure to double check the dimensions.
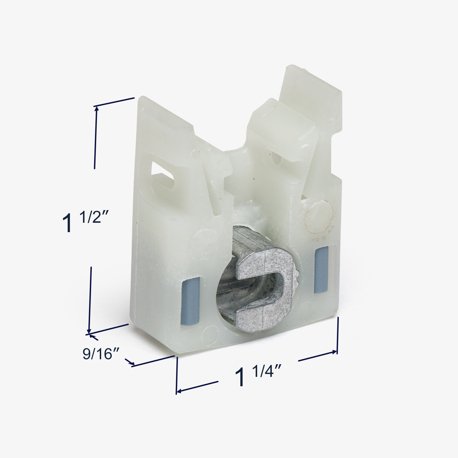
Alternate image for 15-177

The compatible coil spring is the 1/2" thick Series 152 Coil Balance, which attaches to the 33-072 screw. To select the right coil from the list of coils in that link, you'll need to look for stamps on the metal. The stamp indicates the amount of tension that particular coil can support.

If there aren't any stamps, you'll need to obtain the exact weight of the sash and divide that by the total number of coils in the window; in this case (6).

To replace the covers, you'll need the 15-143 Coil Bushing, 15-144 Coil Bushing Cap, and the 15-145 Coil Support Barrel.

Be sure to look over the video tutorials tagged below for an idea on how to remove and install these assemblies.

Reply to Thread
Current Photos:
Related Products
Related Videos